
The IGEL OS SCCM Add-On automates the preparation of components required to deploy IGEL OS through Microsoft Configuration Manager (SCCM).
If the add-on cannot connect directly to the SCCM infrastructure, administrators can use their existing SCCM processes to create the required Windows PE boot image and task sequence manually.
This document explains the underlying IGEL OS deployment process and is intended for administrators familiar with Microsoft Configuration Manager, Windows PE, and operating system deployment.
Prerequisites
You require:
-
A Microsoft Configuration Manager environment that can boot target devices in Windows PE and run custom task sequences.
-
An existing x64 SCCM Windows PE
boot.wimcontaining the required network and storage drivers.
Using the existing SCCM boot image has the advantage that the Windows PE configuration and drivers already maintained for the SCCM environment can be reused. The original SCCM boot image should not be modified directly. Create a copy of its boot.wim and use the copy as the basis for the IGEL OS deployment image.
-
Administrator permissions to modify WIM files with Deployment Image Servicing and Management (DISM).
-
A supported target device with at least 4 GB RAM. For hardware requirements, see Devices Supported by IGEL OS 12.
-
An IGEL OS
.binimage. Download it from the IGEL App Portal. -
The IGEL SCCM manual deployment tools: igel_tools.zip
Thedd.execontained inigel_tools.zipwrites the IGEL OS image directly to a physical disk.dd.exemust be available within the Windows PE environment.
A typical command has the following form:
dd.exe if=X:\igel.bin of=\\?\Device\Harddisk0\partition0 bs=1M --size --progress
Where:
-
if=specifies the IGEL OS.binimage -
of=specifies the physical target disk -
bs=1Mspecifies the block size used for writing the image -
--sizedisplays the amount of data to be written -
--progressdisplays the write progress
Modifications to the supplied tools and customer-specific SCCM configurations are outside the scope of official IGEL support.
Understand the IGEL OS Deployment Process
Unlike a Windows WIM deployment, an IGEL OS .bin file is a complete disk image. During deployment, the complete IGEL OS image is written directly to the selected physical disk from a Windows PE environment. The dd.exe utility performs this raw disk write.
The following image gives a high-level overview of the process:
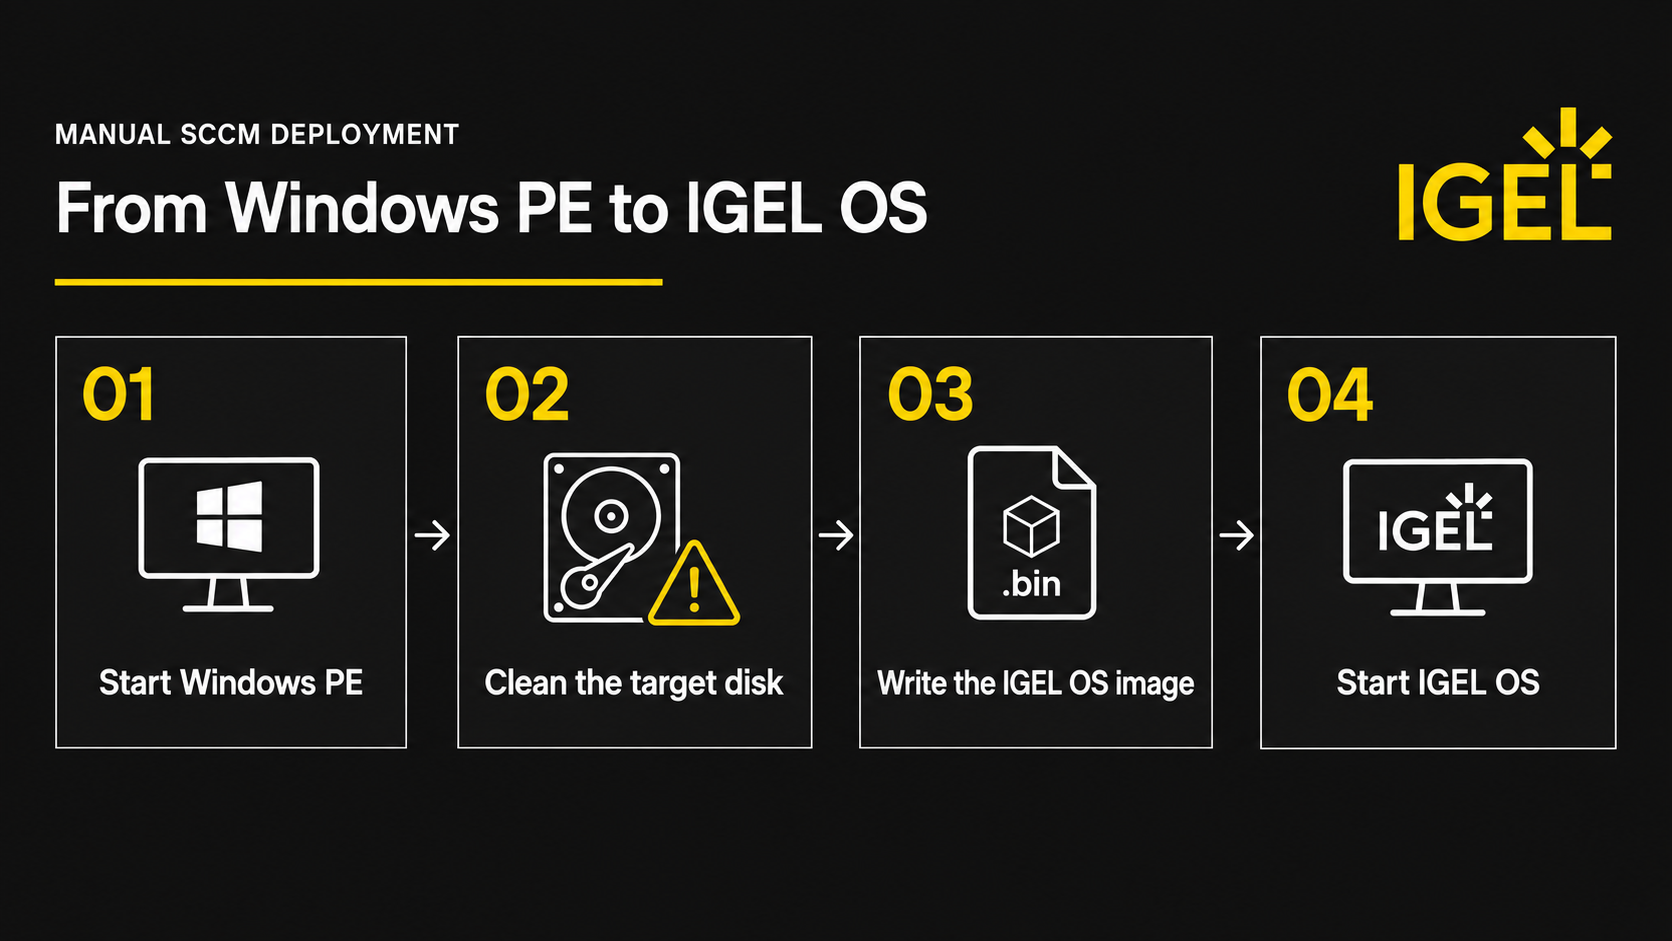
The deployment process consists of the following steps in detail:
-
Prepare a customized Windows PE image.
Start with an existing SCCM x64boot.wimand add the files required for the deployment, includingdd.exeandclean.txt. -
Boot the target device into Windows PE.
-
Select and clean the target disk.
Before writing the IGEL OS image, remove the existing partitioning information from the selected physical disk using DiskPart. -
Make the IGEL OS image available.
The IGEL OS.binimage can either be embedded in the Windows PE boot image or provided from a network location. -
Write the IGEL OS image to the target disk.
Usedd.exeto write the complete.binimage directly to the selected physical disk. Because the IGEL OS image already contains the required disk and partition layout, SCCM does not need to create or format the IGEL OS partitions or use the standard Apply Operating System Image task. -
Boot from the target disk.
After the image has been written successfully, boot the device from the target disk. IGEL OS then performs the required initialization during its first boot.
The deployment process removes the existing partition information and overwrites the selected target disk. Existing data on the selected disk will be lost.
The SCCM implementation can be adapted to the existing deployment infrastructure as long as these fundamental steps are preserved.
Create the Windows PE Boot Image
The Windows PE boot image provides the environment from which the IGEL OS image is written to the target disk. Use an existing x64 SCCM Windows PE boot image as the starting point. The WIM file can be modified using the Microsoft Deployment Image Servicing and Management tool (DISM).
The following image shows a high-level overview of the process.
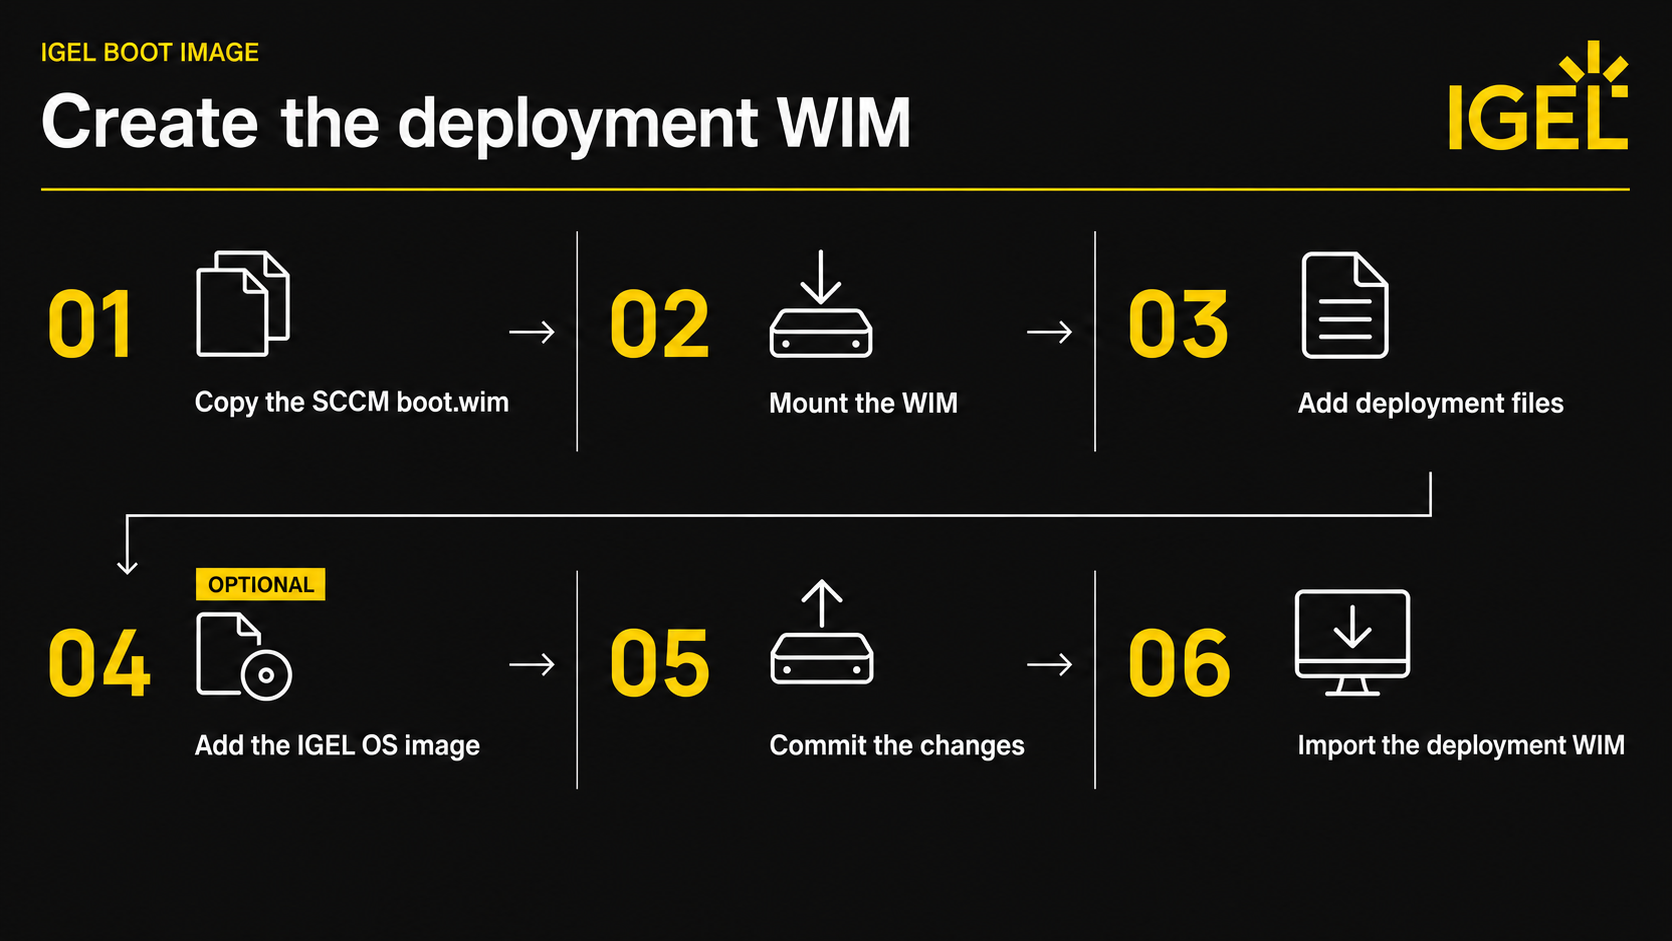
To create the Windows PE Boot Image:
-
On an administrative workstation, extract
igel_tools.zip.
-
Create a working directory and a mount directory:
mkdir C:\IGEL-SCCM
mkdir C:\IGEL-SCCM\mount
-
Copy an existing x64 SCCM boot image without modifying the original:
copy <SCCM-boot-image-path>\boot.wim C:\IGEL-SCCM\igel.wim
-
Mount the copied Windows PE image using DISM in
igel.wim:
dism /Mount-Image /ImageFile:C:\IGEL-SCCM\igel.wim /Index:1 /MountDir:C:\IGEL-SCCM\mount
After the operation completes, the Windows PE file system is accessible through: C:\IGEL-SCCM\mount\
Files copied into this directory become part of the Windows PE environment after the changes are committed.
For example, a file copied to C:\IGEL-SCCM\mount\dd.exe is available after booting Windows PE as X:\dd.exe
-
Copy
dd.exeinto the mounted image:
copy dd.exe C:\IGEL-SCCM\mount\dd.exe
dd.exe is used later by the SCCM task sequence to write the IGEL OS .bin image directly to the selected physical disk.
-
Create a file named
clean.txtand set the correct target disk number:
select disk 0
clean
exit
disk 0 is an example. Windows PE disk numbering can differ between hardware models. Selecting the wrong disk causes irreversible data loss.
-
Copy the reviewed DiskPart script into the mounted image:
copy clean.txt C:\IGEL-SCCM\mount\clean.txt
-
Optional: To embed the IGEL OS image in the boot image, rename the selected
.binfile toigel.binand copy it into the mounted image:
copy <path-to-IGEL-OS-image.bin> C:\IGEL-SCCM\mount\igel.bin
Using the fixed name igel.bin allows the Task Sequence to remain independent of the IGEL OS version. If the IGEL OS image is provided from a network location instead, this step can be omitted.
Embedding the IGEL OS image in the Windows PE boot image provides a simple and self-contained deployment method. Once Windows PE has been loaded, no additional network access is required to retrieve the IGEL OS image.
However, embedding the image increases the size of the Windows PE boot image. When a different IGEL OS image is required, the boot image must be modified and redistributed to the SCCM distribution points.
Providing the IGEL OS image from a network location keeps the Windows PE boot image smaller and allows the IGEL OS image to be changed independently. This approach, however, requires network connectivity and access to the image location during deployment.
-
Commit the changes and unmount the image:
dism /Unmount-Image /MountDir:C:\IGEL-SCCM\mount /Commit
The customized IGEL Boot Image is available at C:\IGEL-SCCM\igel.wim.
-
Import
igel.wiminto Microsoft Configuration Manager as a new boot image, for example, IGEL OS Deployment Boot Image.
-
Distribute the new boot image to the required distribution points. Configure it for PXE according to your existing SCCM deployment infrastructure.
Configure the SCCM Task Sequence
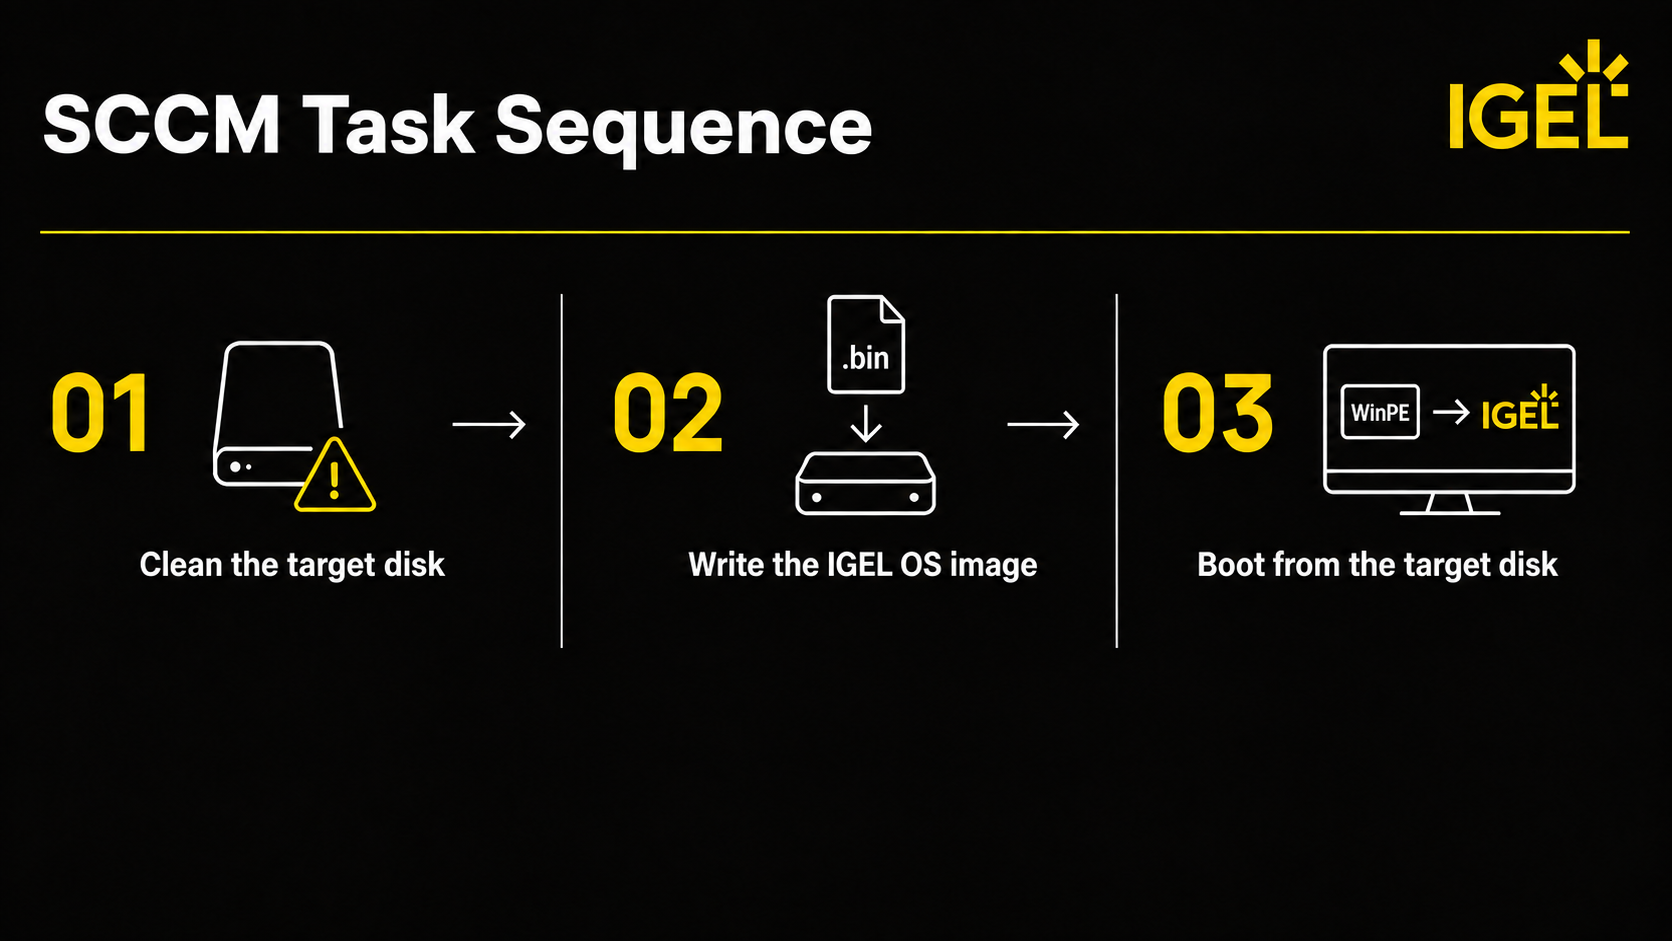
Create a custom SCCM task sequence and configure it to use the IGEL OS deployment boot image created in the previous section.
The following image gives a high-level overview of the Task Sequence.
-
Create a custom Task Sequence and configure it to use IGEL OS Deployment Boot Image.
-
Add a Run Command Line step named Clean IGEL OS Target Disk:
diskpart /s X:\clean.txt
diskpart clean removes the partition layout of the selected disk. Together with the subsequent IGEL OS image write, existing data on the selected disk will be lost.
The target disk may contain partitioning metadata from a previous operating system installation, such as an existing GPT (GUID Partition Table) or MBR partition table. The IGEL OS .bin file represents a complete disk image and contains the disk and partition layout required by IGEL OS. The deployment therefore does not reuse the partition structure already present on the target device. Cleaning the disk before writing the image provides a defined starting state and removes existing partitioning metadata that could otherwise interfere with the disk layout contained in the IGEL OS image.
-
Add a second Run Command Line step named Write IGEL OS Image.
For an embedded igel.bin, enter:
X:\dd.exe if=X:\igel.bin of=\\?\Device\Harddisk0\partition0 bs=1M --size --progress
The command performs a raw write of the complete IGEL OS disk image to the selected physical disk. Harddisk0 must correspond to the disk selected in clean.txt. Adjust both locations together when another physical disk is the deployment target.
In this example X:\igel.bin is the input image, and \\?\Device\Harddisk0\partition0 is the target disk.
-
Configure the Task Sequence to stop if either command returns an error. Do not continue to the boot transition after an unsuccessful disk-clean or image-write operation.
-
After
dd.execompletes successfully, use your established SCCM workflow to end Windows PE and start the device from the target disk.
A specific SCCM restart step is not required by the IGEL OS image deployment mechanism itself. How the transition from Windows PE to the newly deployed system is performed depends on the SCCM task sequence and deployment environment.
When the device starts from the target disk, IGEL OS performs its first-boot initialization.
IGEL OS Image Delivery Options
The IGEL OS .bin image must be accessible from Windows PE when the Task Sequence writes the image to the target disk. You can embed the image in the Windows PE boot image or provide it separately from a network location.
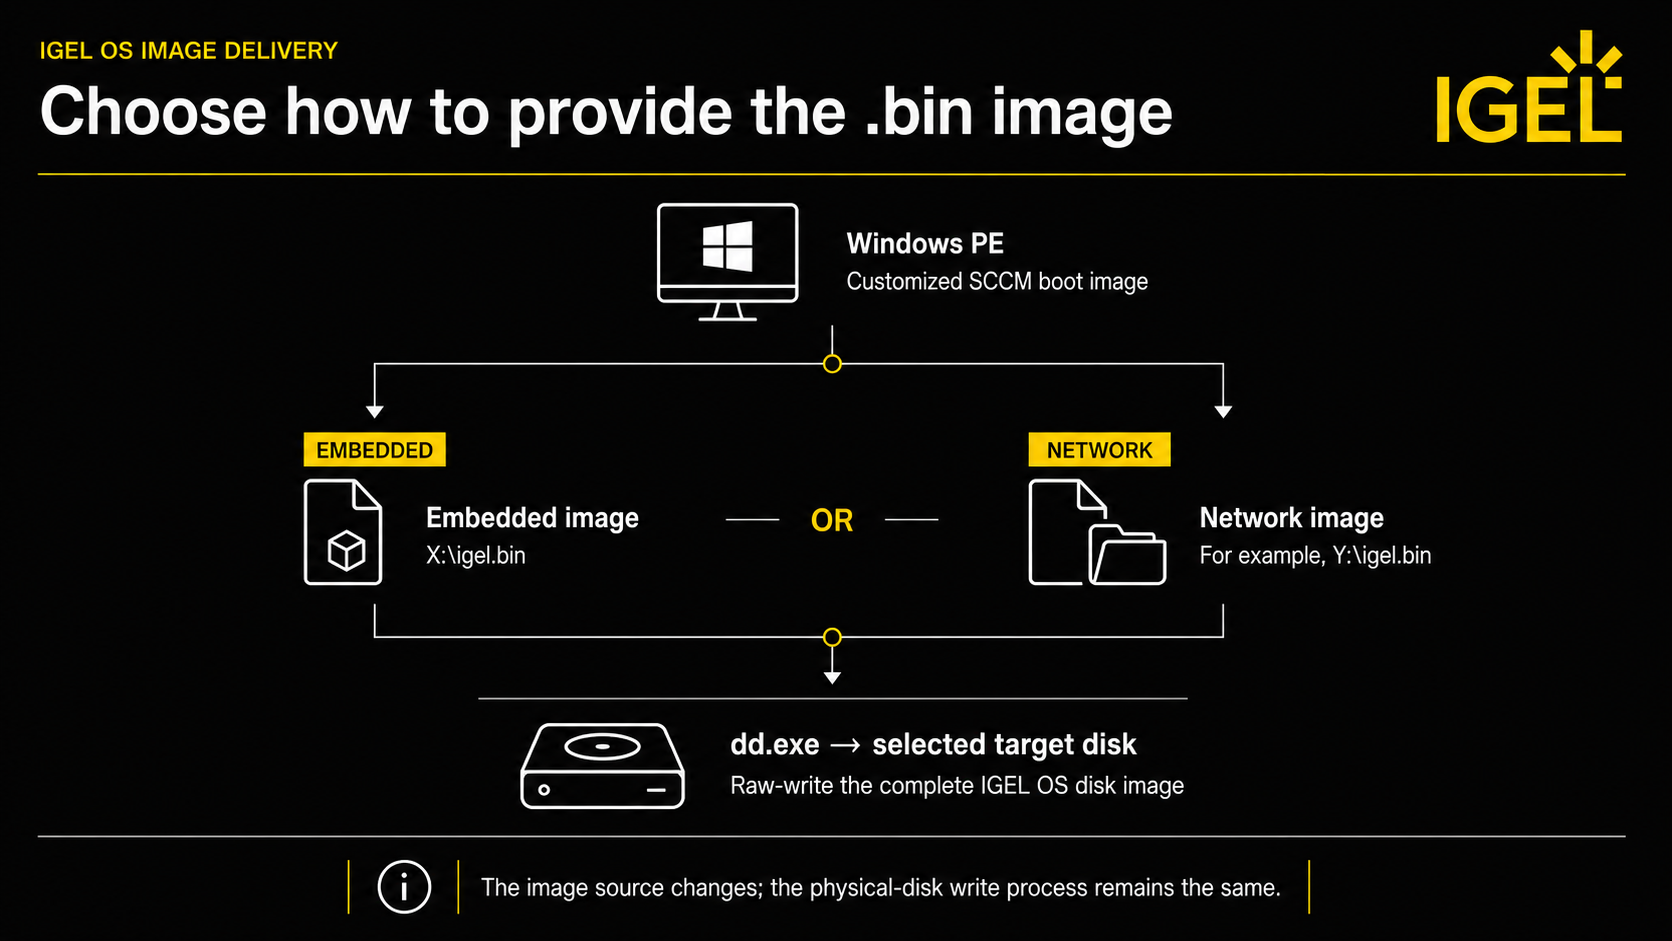
Choose the delivery method based on image size, network availability, and how frequently you update the IGEL OS image.
|
Delivery method |
Advantages |
Considerations |
|---|---|---|
|
Embedded image |
|
|
|
Network image |
|
|
Embed the Image in the Windows PE Boot Image
With this method, the customized Windows PE boot image contains all files required for deployment, including the IGEL OS image.
After Windows PE starts, all components required to write the IGEL OS image are locally available.
The task sequence executes:
diskpart /s X:\clean.txt
followed by:
X:\dd.exe if=X:\igel.bin of=\\?\Device\Harddisk0\partition0 bs=1M --size --progress
Provide the Image from a Network Location
With this method, the customized Windows PE boot image contains only the deployment components (dd.exe and clean.txt). The IGEL OS .bin image remains on a network location that Windows PE can access during deployment.
Before running dd.exe, configure the Task Sequence to authenticate to the network location and make the image available in Windows PE. The authentication and access method depends on your SCCM and network configuration.
For example, when the network location is available as drive Y:, write the image with:
X:\dd.exe if=Y:\igel.bin of=\\?\Device\Harddisk0\partition0 bs=1M --size --progress
Confirm that the network image is fully accessible before cleaning the target disk. If the image cannot be retrieved after the disk has been cleaned, the device will not have a bootable operating system.
Verify the Deployment
On a non-production target device:
-
Confirm that the device loads IGEL OS Deployment Boot Image.
-
Confirm that Windows PE assigns the expected number to the target disk.
-
Confirm that the DiskPart step completes successfully.
-
Confirm that
dd.exedisplays progress and completes without an error. -
Confirm that the device starts from the target disk.
-
Confirm that IGEL OS completes first-boot initialization.