This article describes how to invite users, cancel or renew invitations, and add roles to a user or remove roles in the IGEL Customer Portal. Also included is a description of how to use Okta or Ping as federated identity providers (IdP) for logging in to your IGEL Cloud Services accounts.
Roles and Permissions
In the IGEL Customer Portal, you can find the following roles:
-
Super Admin
The first account you register in the IGEL Customer Portal > Register is your Super Admin account. For details on registration, see Using the IGEL Customer Portal.
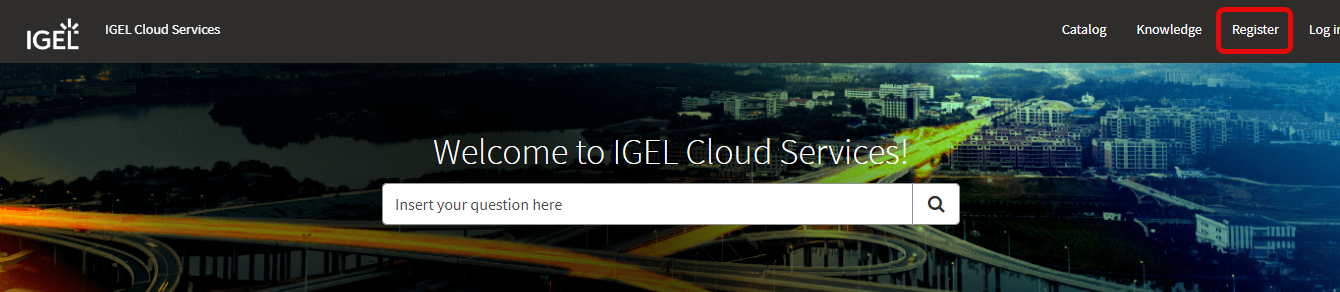
The Super Admin is the first user to register any new account.
-
Account Admin
-
OBS Admin
-
UMS Admin
-
App Portal
-
App Creator
-
Customer Support Account Manager
The users with these roles have the following permissions:
|
|
Super Admin |
Account Admin |
OBS Admin |
UMS Admin |
App Portal |
App Creator |
Customer Support
|
|---|---|---|---|---|---|---|---|
|
Account Management |
|||||||
|
View account |
|
|
|
|
|
|
|
|
User Management |
|||||||
|
View users |
|
|
|
|
|
|
|
|
Invite users |
|
|
|
|
|
|
|
|
Add / remove user roles |
|
|
|
|
|
|
|
|
OBS IdP (Onboarding Service Identity Provider) |
|||||||
|
Register IGEL OS IdP |
|
|
|
|
|
|
|
|
Use OBS instance |
|
|
|
|
|
|
|
|
IGEL OS Onboarding |
|||||||
|
Register OBS instances |
|
|
|
|
|
|
|
|
View OBS attributes |
|
|
|
|
|
|
|
|
Use OBS attributes |
|
|
|
|
|
|
|
|
Create OBS attributes |
|
|
|
|
|
|
|
|
Add / change OBS attributes |
|
|
|
|
|
|
|
|
UMS Management |
|||||||
|
View UMS instances |
|
|
|
|
|
|
|
|
Use UMS instances |
|
|
|
|
|
|
|
|
Create UMS instances |
|
|
|
|
|
|
|
|
Add / change UMS instances |
|
|
|
|
|
|
|
|
IGEL App Portal |
|||||||
|
Download apps and other software from the IGEL App Portal |
|
|
|
|
|
|
|
|
IGEL App Creator Portal |
|
|
|
|
|
|
|
|
Create apps via the IGEL App Creator Portal |
|
|
|
|
|
|
|
|
Only for IGEL Ready Partners: Submit apps for distribution via the IGEL App Portal |
|
|
|
|
|
|
|
|
Support / Case Management |
|||||||
|
View support cases |
|
|
|
|
|
|
|
|
Submit support cases |
|
|
|
|
|
|
|
|
View RMA cases |
|
|
|
|
|
|
|
|
Submit an RMA case |
|
|
|
|
|
|
|
|
Submit reset key cases |
|
|
|
|
|
|
|
|
Submit license question cases |
|
|
|
|
|
|
|
Inviting a User and Assigning a Role
In the following example, we will invite a new user and make this user an OBS administrator.
-
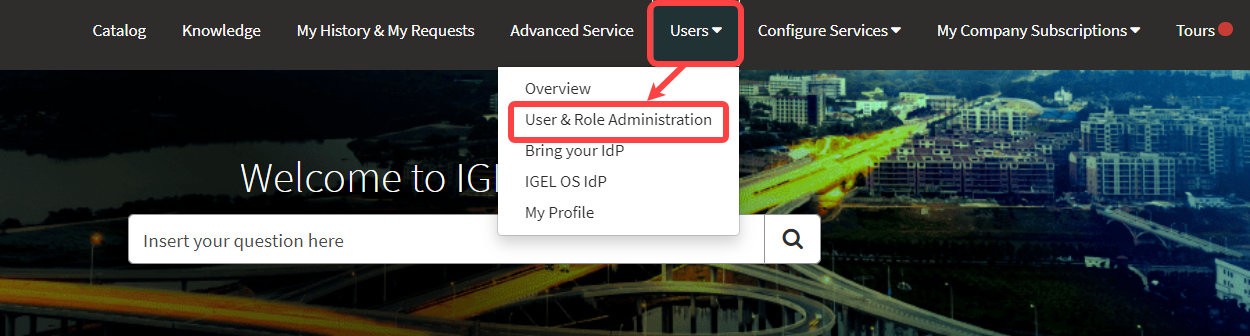
Open the IGEL Customer Portal, log in to your admin account, and select Users > User & Role Administration.
-
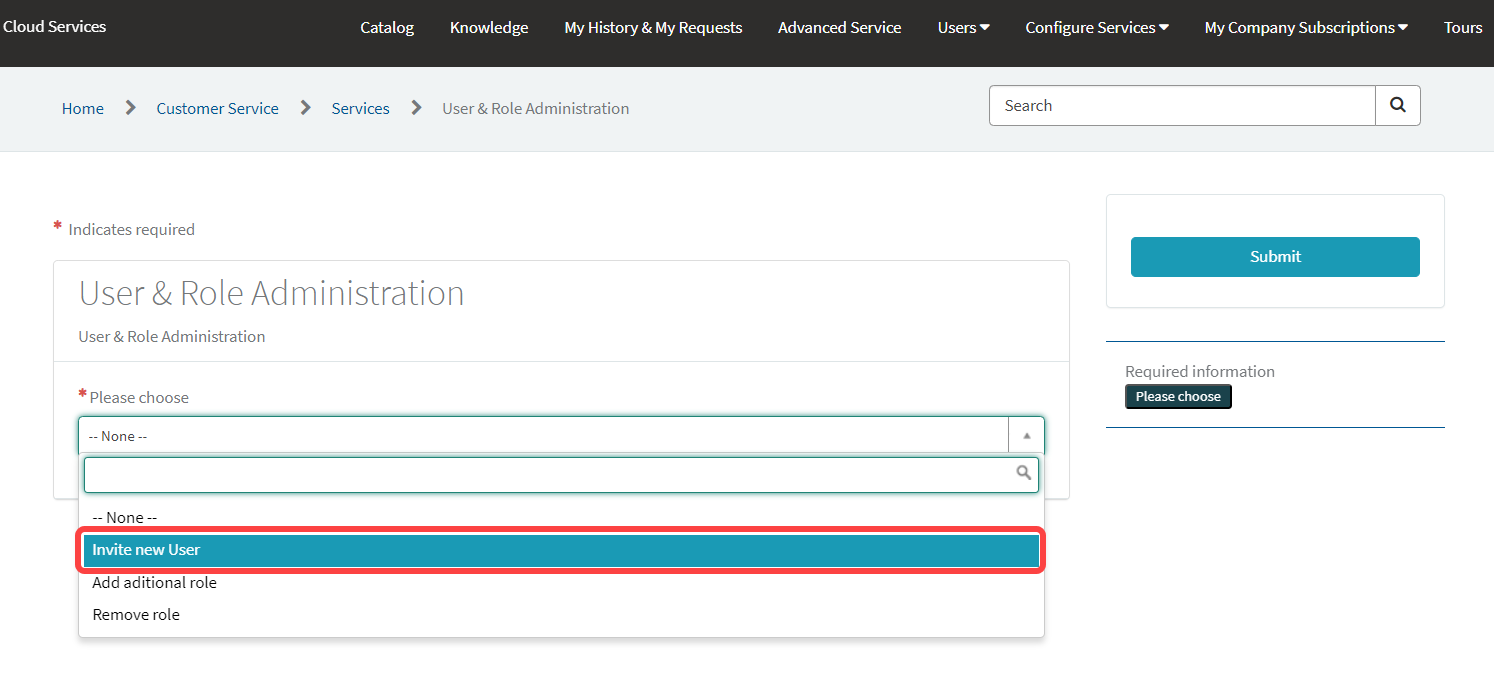
Select Invite new user.
-
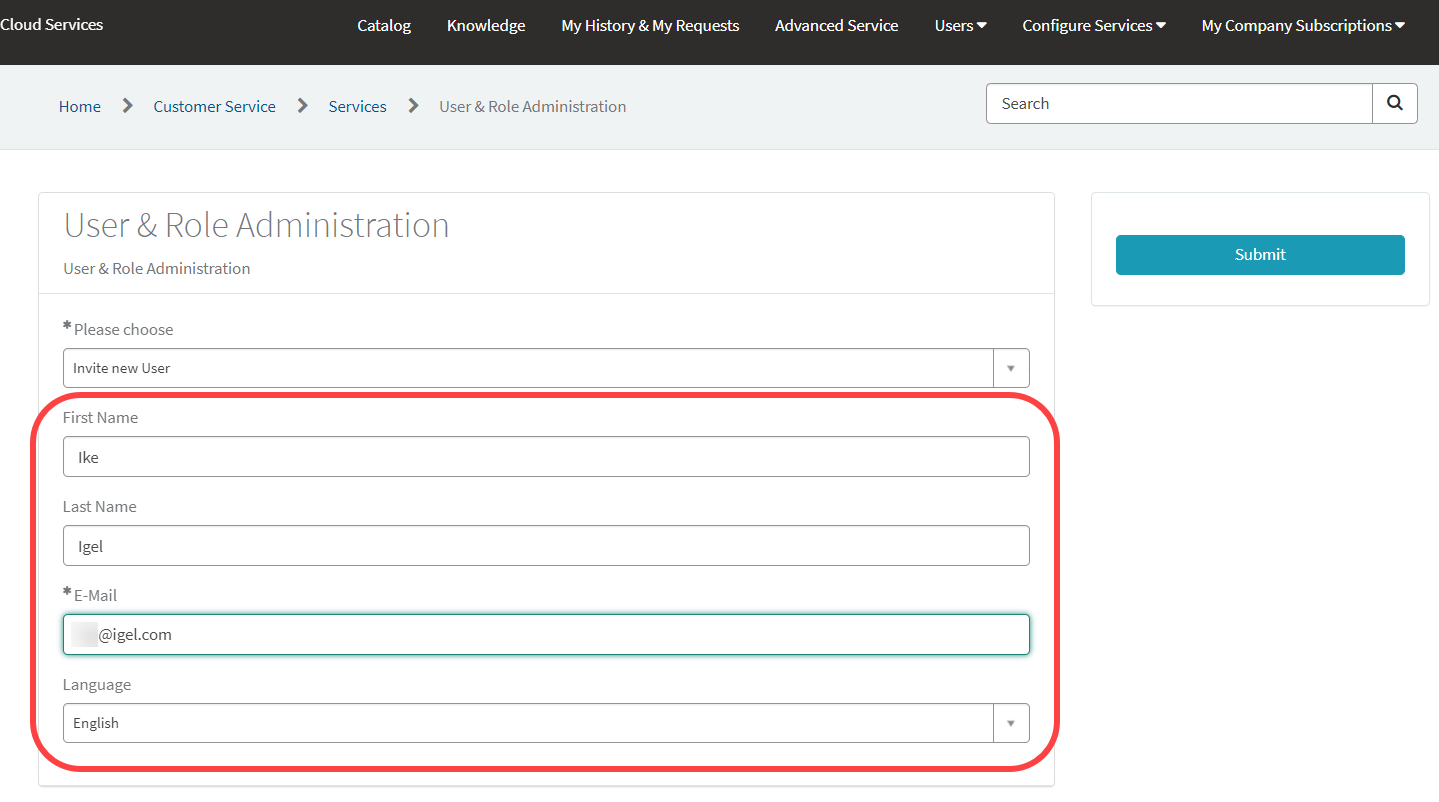
Provide the data of the new user:
-
First name: First name of the user
-
Last name: Last name of the user
-
E-mail (required): E-mail address of the user
-
Language: Preferred language for the user
-
-
Select OBS Admin as the role and click Submit.
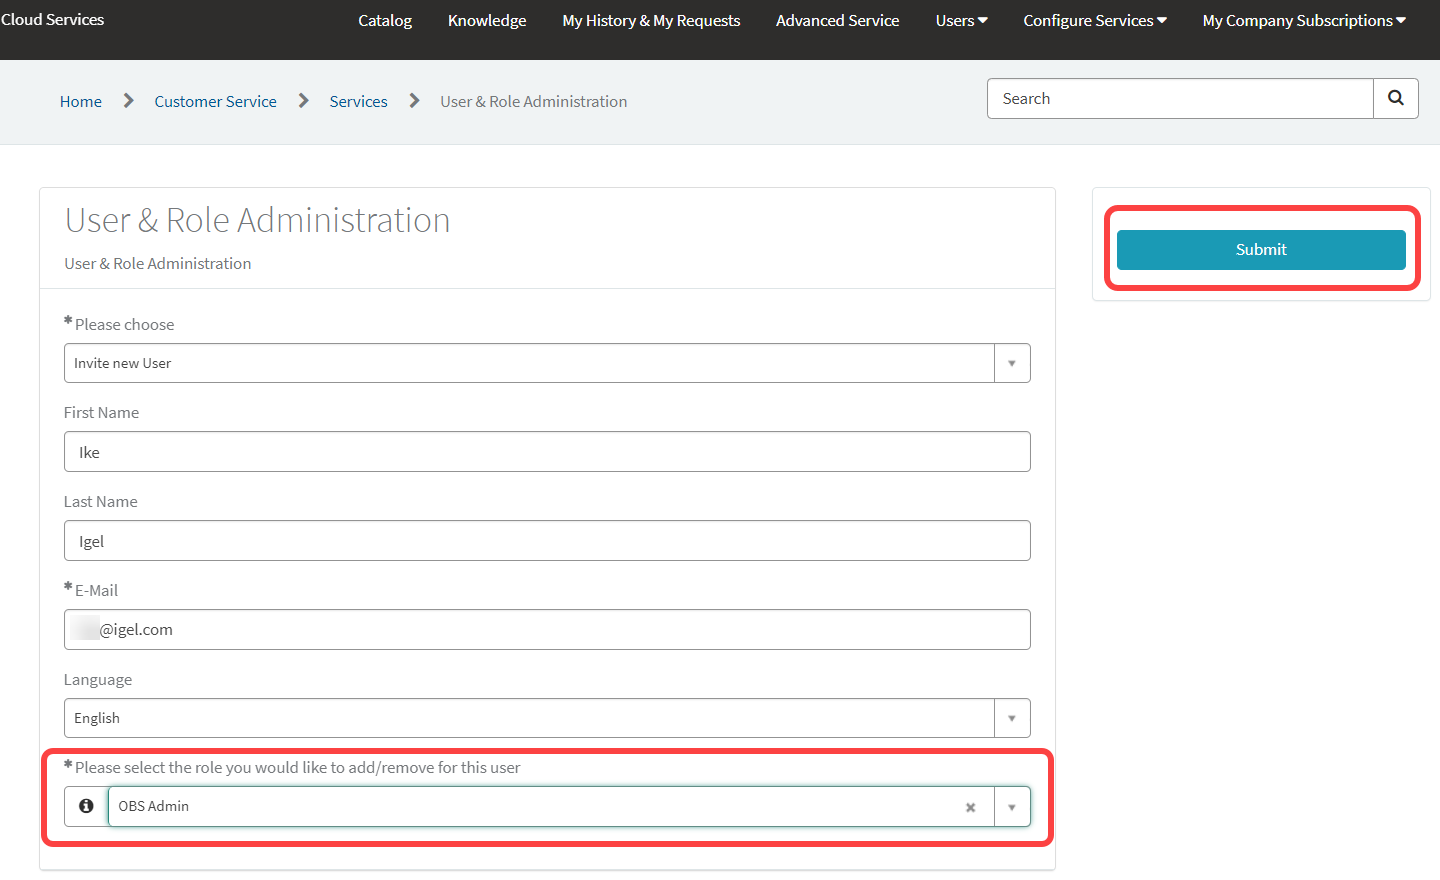
The invitation mail is sent to the user.
The list of users is displayed; it includes the newly added user.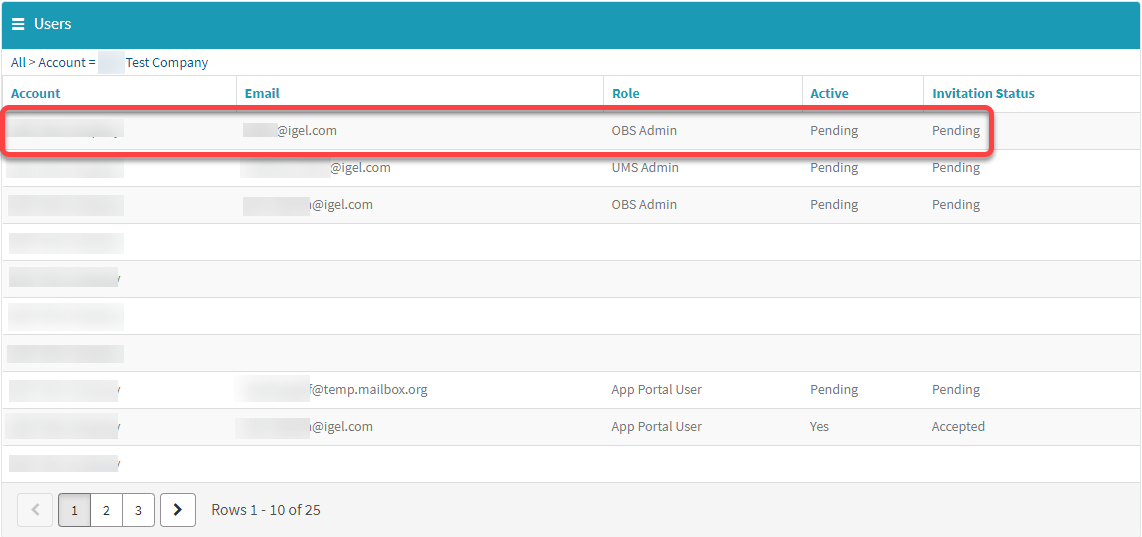
When the user accepts the invitation, the account is created, and the role is assigned. (If the user declines, the account is not created.)
The Super Admin receives a confirmation e-mail.
Canceling and Resending Invitations
You can cancel or resend pending invitations if you have one of the following roles:
-
Super Admin
-
Account Admin
Pending invitations older than 30 days will be deleted automatically. If an invitation has been deleted, you can create a new one.
-
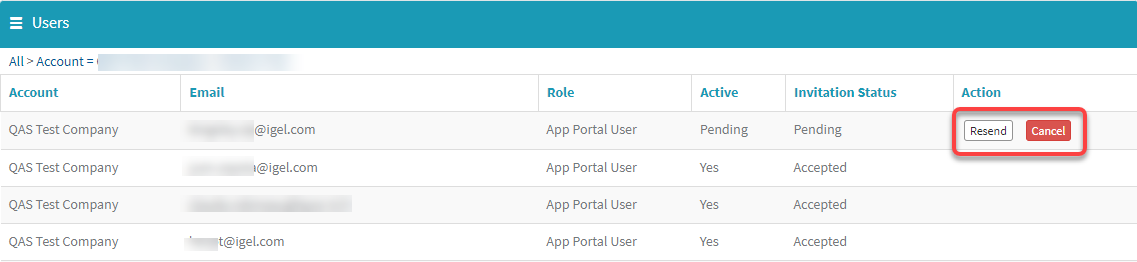
Open the IGEL Customer Portal, log in to your admin account, and select Users > Overview.
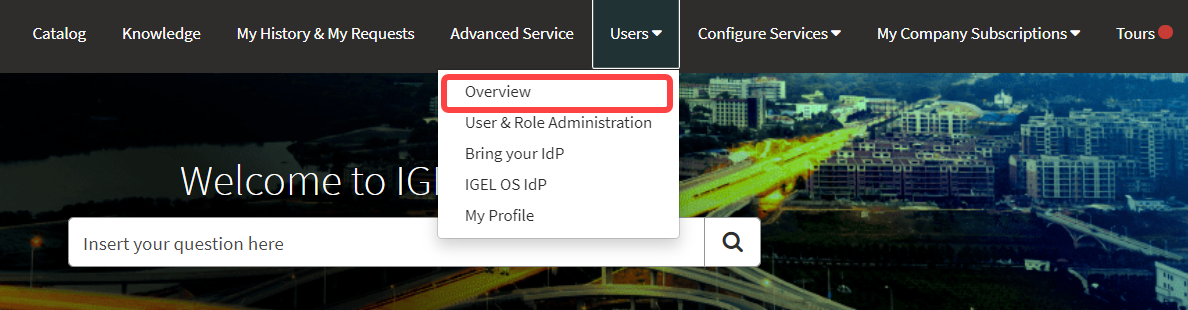
The users are listed.
-
Find the relevant user and click on Resend or Cancel, as appropriate.
Adding a Role to an Existing User
-
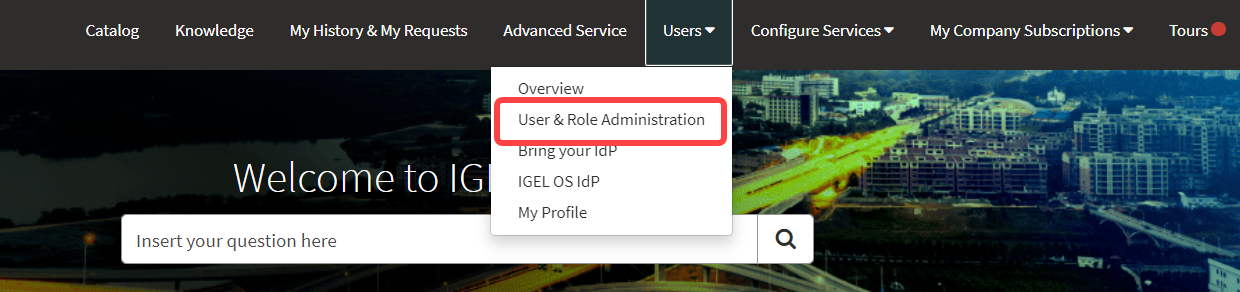
Open the IGEL Customer Portal, log in to your admin account, and select Users > User & Role Administration.
-
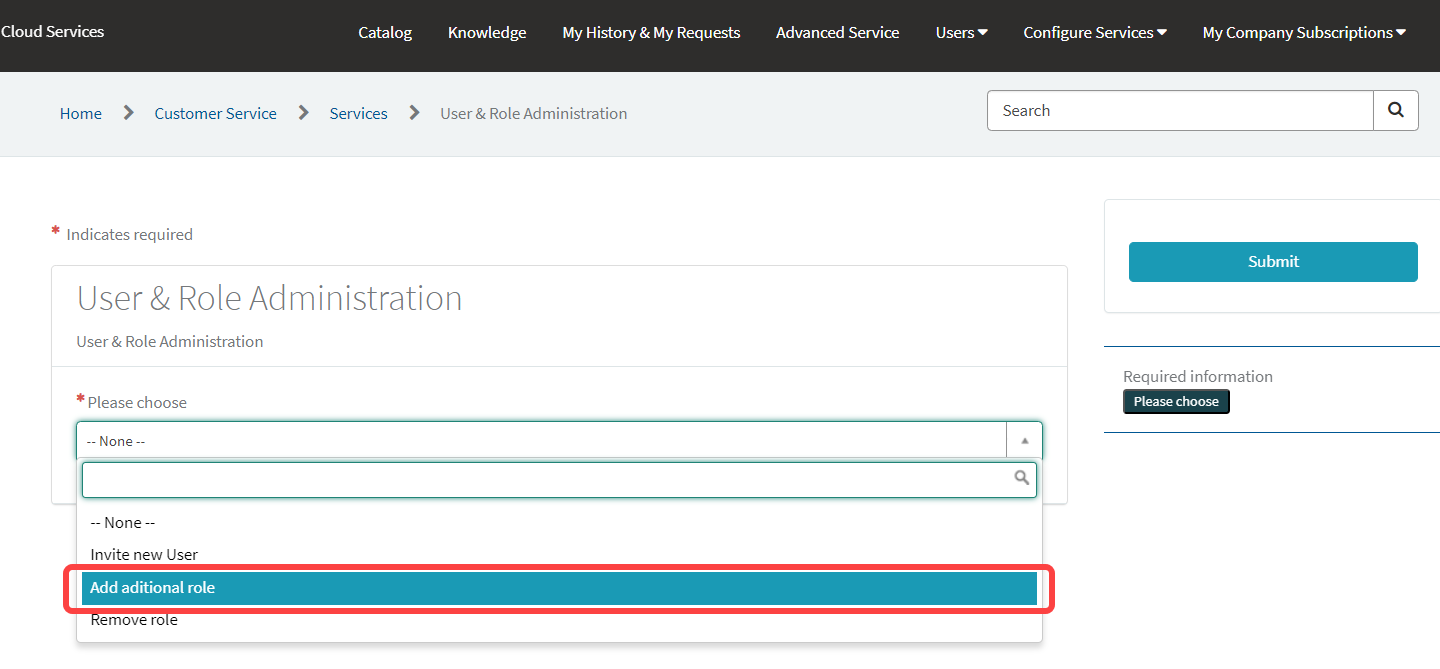
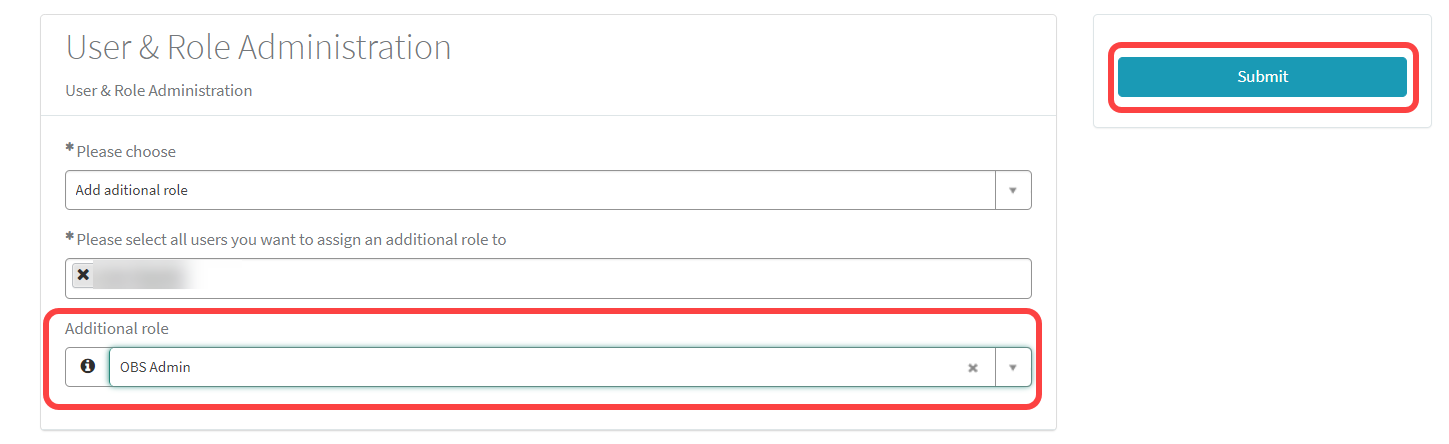
Select Add additional role.
-
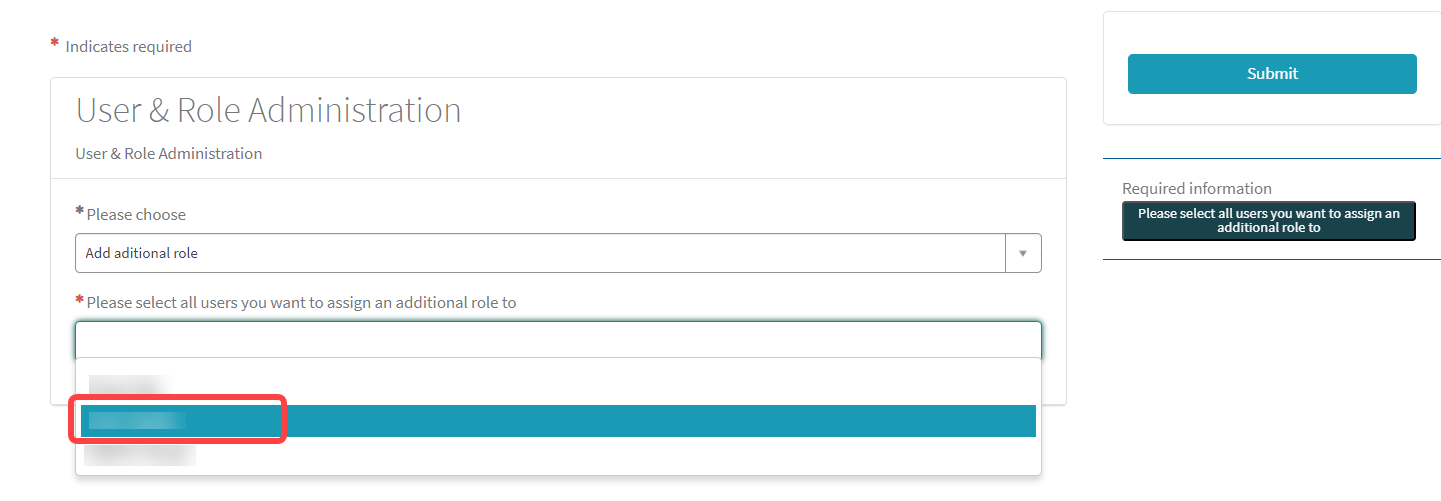
Select one or more users who should be assigned the role.
-
Select OBS Admin as the additional role and click Submit.
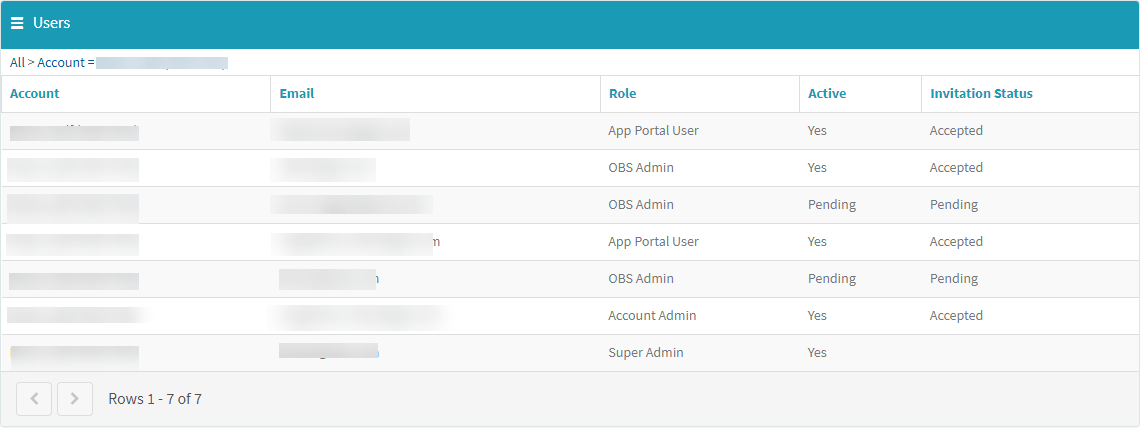
The updated list of users is displayed.
Removing a Role / Deactivating a User
You can remove one or more rules from a user. If you deactivate a user, the account is deleted. No e-mails will be sent to this account anymore.
-
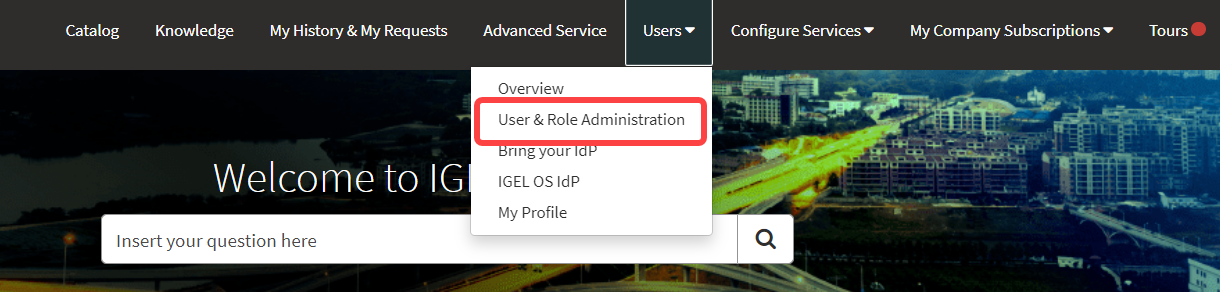
Open the IGEL Customer Portal, log in to your admin account, and select Users > User & Role Administration.
-
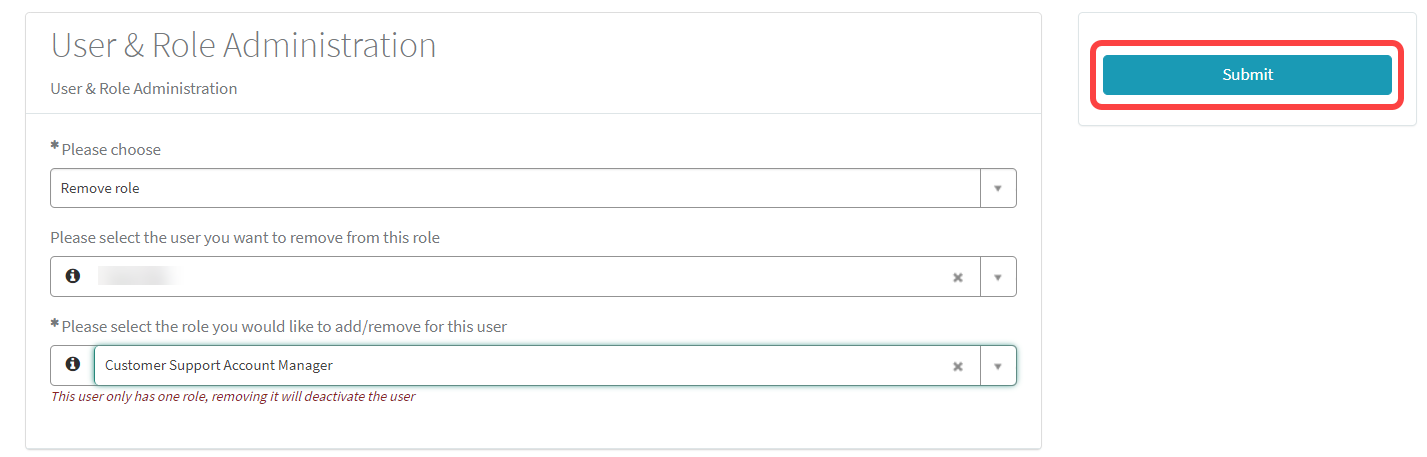
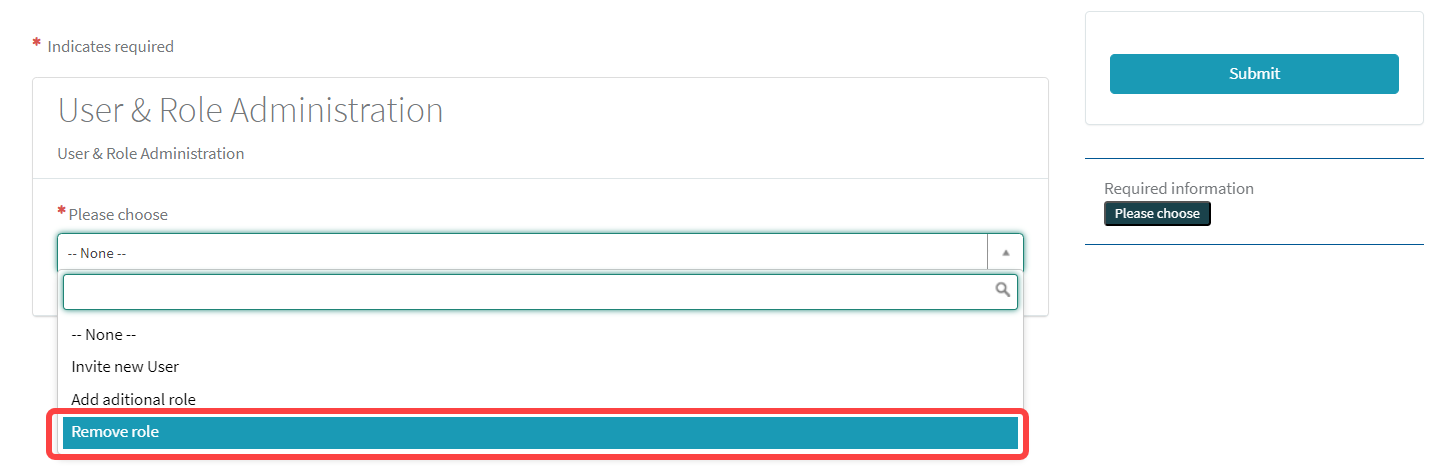
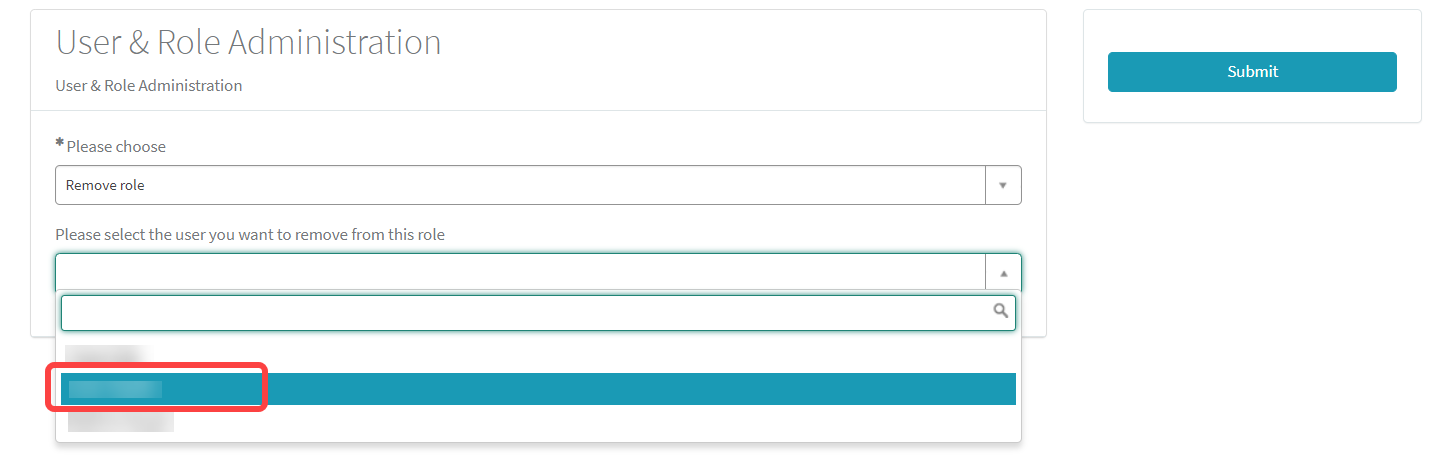
Select Remove role.
-
Select the user from whom you want to remove a role.
-
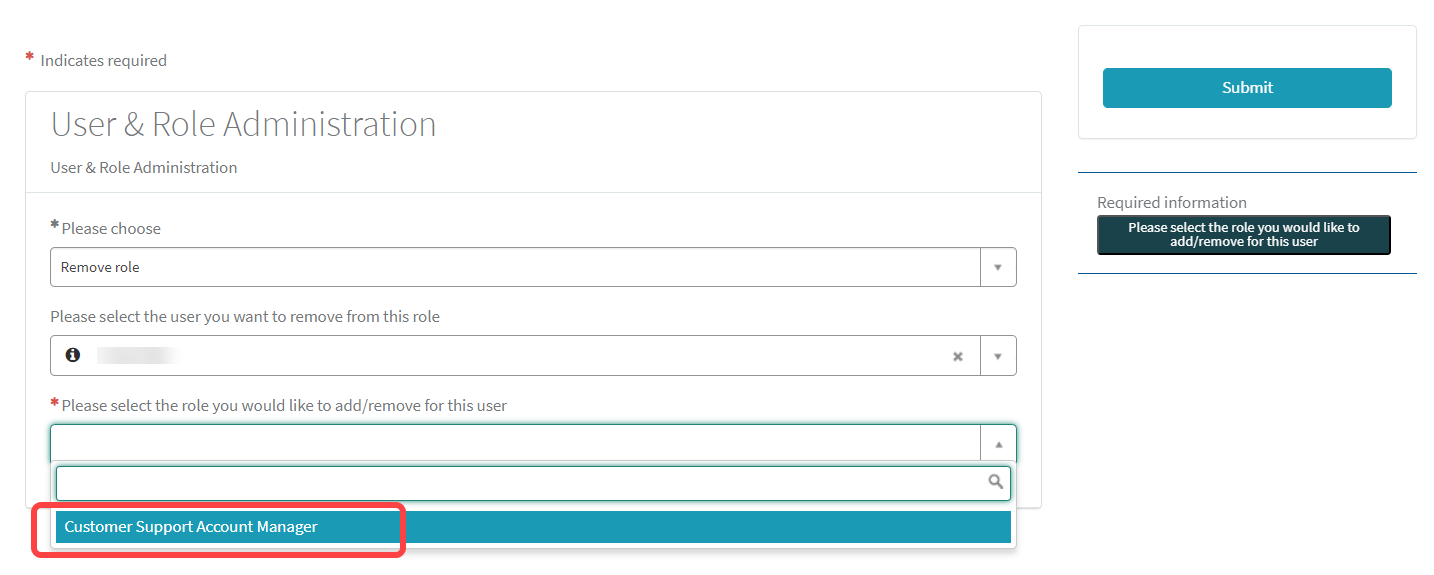
Select the role you want to remove from the user.
-
Click Submit to confirm the change.