
You can run published Microsoft Windows apps from a Windows 11 virtual machine (VM) that is running in the IGEL Managed Hypervisor (IMH) on your IGEL OS device. This way, you can use Windows apps seamlessly from your IGEL OS desktop.
For details on IMH, see How To Create, Distribute, and Manage Virtual Machines with the IGEL Managed Hypervisor (IMH).
Prerequisites
-
Your IGEL OS 12 device has enough CPU, RAM, and storage capacity for Windows 11 as a virtual guest
-
IMH 1.1.0 or higher is installed on your device
-
IGEL Remote Desktop 1.4.0 or higher is installed on your device
-
Windows 11 is available as a VM under IMH
-
The apps you want to use are installed on your Windows 11 VM
Configuring your Windows 11 VM
The details for the following configuration steps can be found under Enable Remote Desktop on your PC.
→ Ensure your Windows 11 VM has a fixed IP address so that the RDP client (IGEL Remote Desktop) can connect to it consistently.
→ Ensure that Remote Desktop is enabled on your Windows 11 installation. For details, see Enable Remote Desktop.
→ Ensure that users of your apps have RDP permissions, either as individual users or as part of a group. For details, see Enable Remote Desktop.
The Windows VM can be non-domain joined, AD domain joined, or Entra ID joined.
→ If you are using Microsoft Entra ID accounts or Microsoft Active Directory (AD) accounts, ensure that Network Level Authentication (NLA) is disabled.
→ Set the network policy to “Private” or, if you have a domain-joined device, to “Domain”. When it is set to “Public”, RDP will not work.
→ Create a registry entry for each application you want to run in seamless mode. Feel free to use the following sample .reg file for Microsoft Word (please note that this is a non-binding example and there is no official support from IGEL):
[HKEY_LOCAL_MACHINE\SOFTWARE\Microsoft\Windows NT\CurrentVersion\Terminal Server\TSAppAllowList\Applications\Word]
"CommandLineSetting"=dword:00000000
"RequiredCommandLine"=""
"Name"="Word"
"Path"="C:\Program Files\Microsoft Office\root\Office16\winword.exe"
"ShortPath"="C:\Program Files\Microsoft Office\root\Office16\winword.exe"
"IconPath"="C:\Program Files\Microsoft Office\root\Office16\winword.exe"
"IconIndex"=dword:00000000
"ShowInTSWA"=dword:00000001
"SecurityDescriptor"="
Minimal example:
[HKEY_LOCAL_MACHINE\SOFTWARE\Microsoft\Windows NT\CurrentVersion\Terminal Server\TSAppAllowList\Applications\Word]
"Name"="Word"
"Path"="C:\Program Files\Microsoft Office\root\Office16\winword.exe"
Configuring IGEL Remote Desktop
Setting IMH to Autostart
To ensure that the Published Apps will be available immediately, we will set the IMH to autostart.
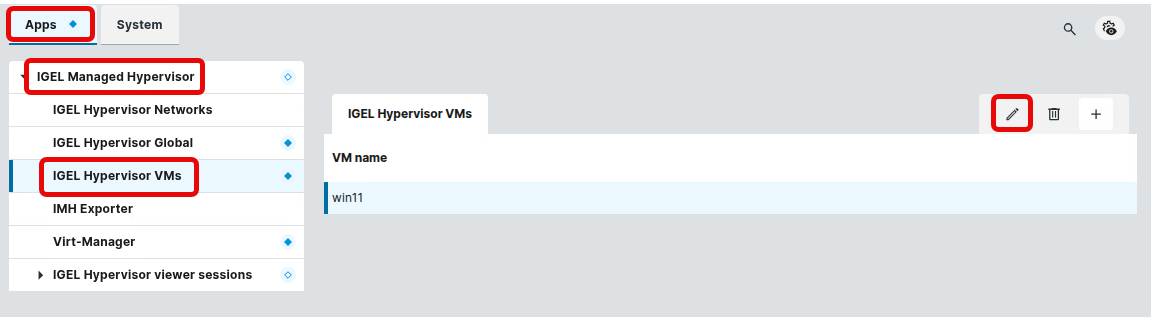
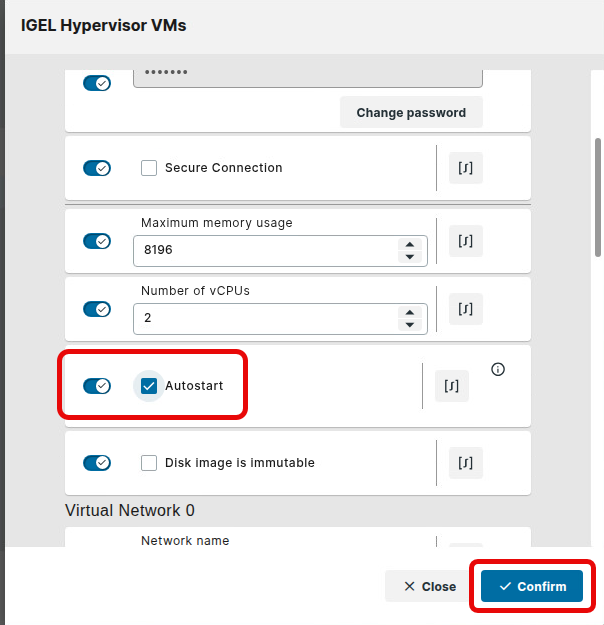
→ In the profile that configures your IMH, open Apps > IGEL Managed Hypervisor > IGEL Hypervisor VMs [session name] for editing and enable Autostart.
Setting up a Published Apps Session
In the following, we will set up a session that creates one or more RDP client configurations to control a specific Windows app. For each app, a starter icon can be configured.
-
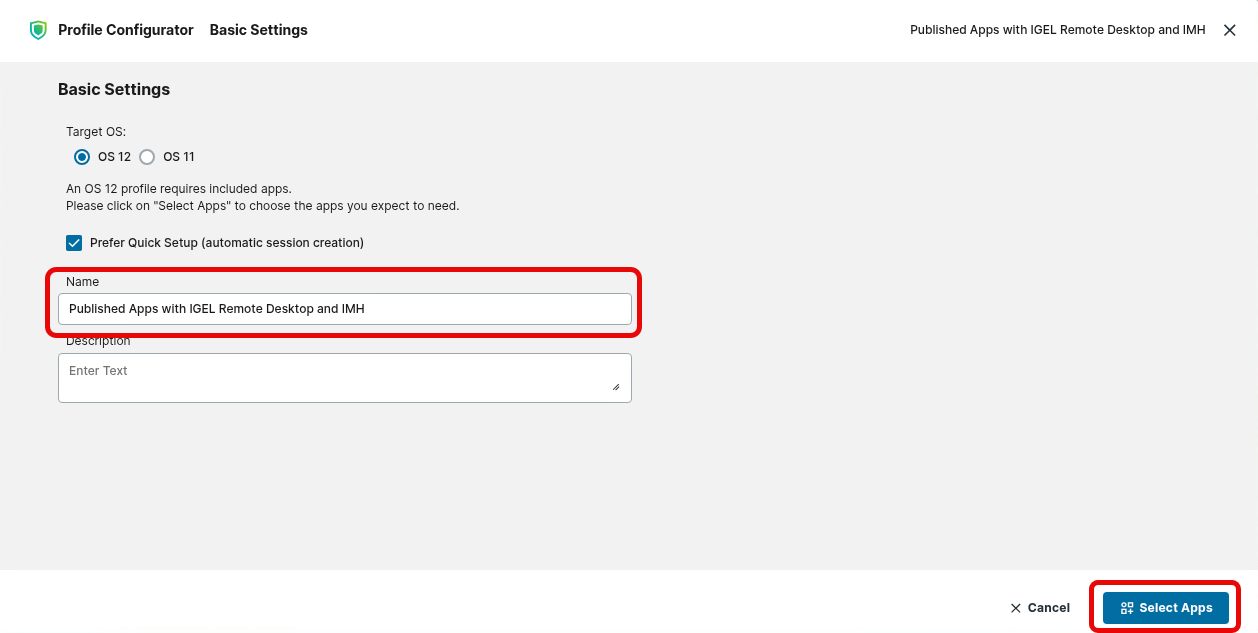
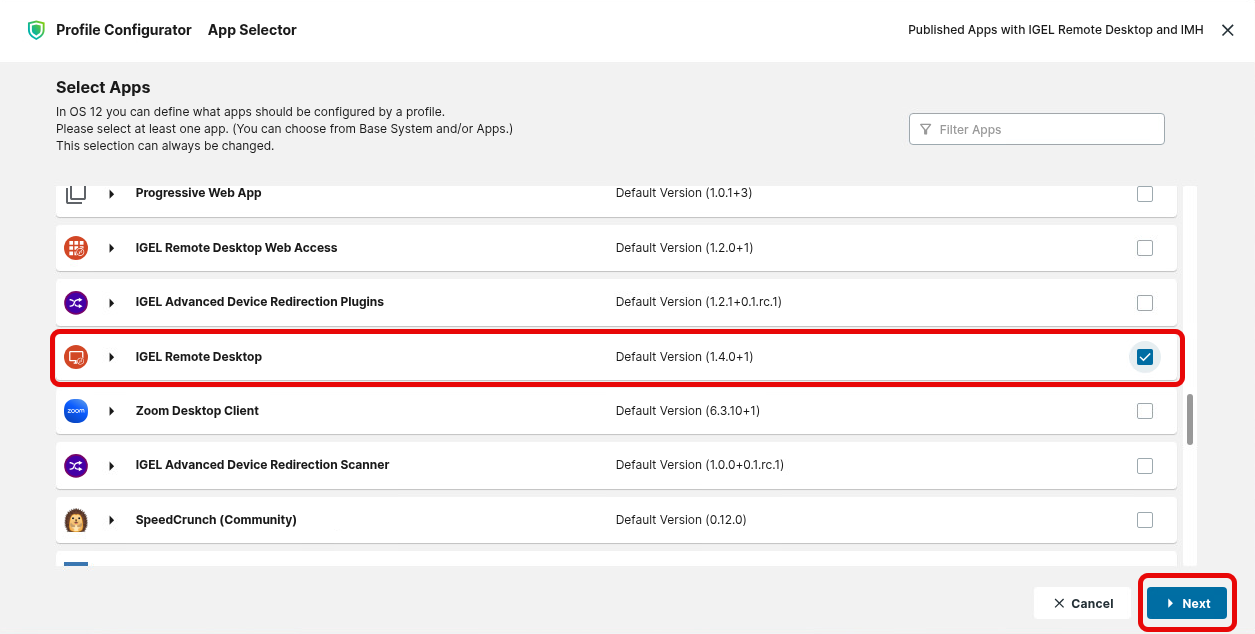
Create a profile for IGEL Remote Desktop with a suitable name.
-
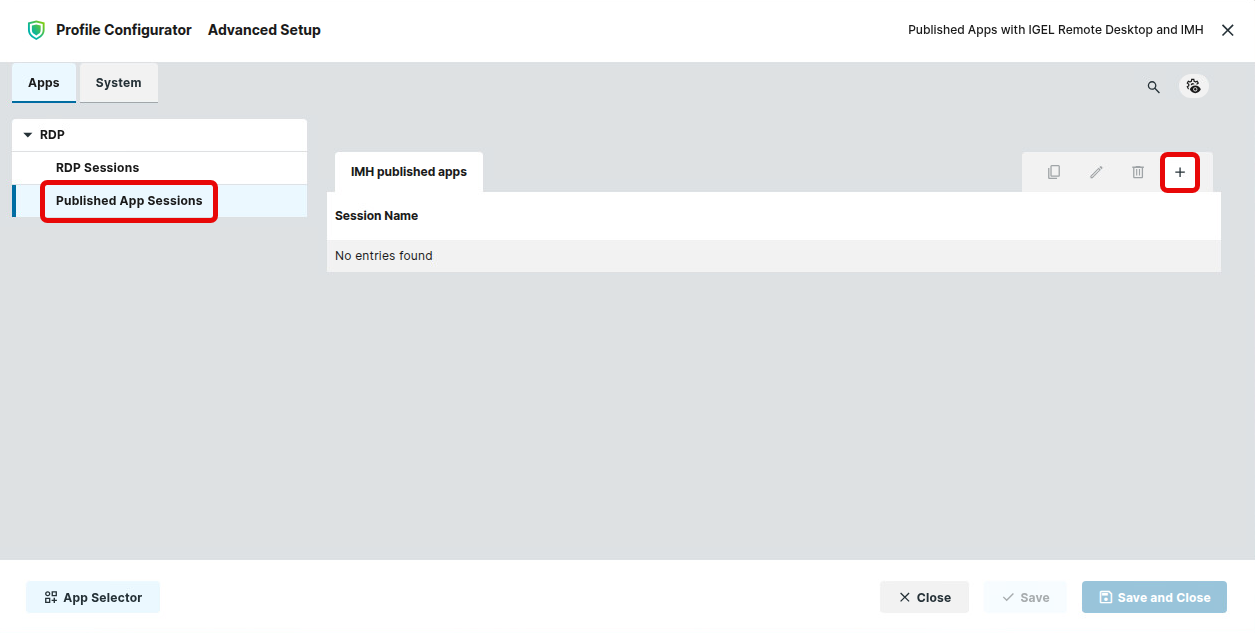
Select RDP > Published App Sessions and add a Published Apps session.
-
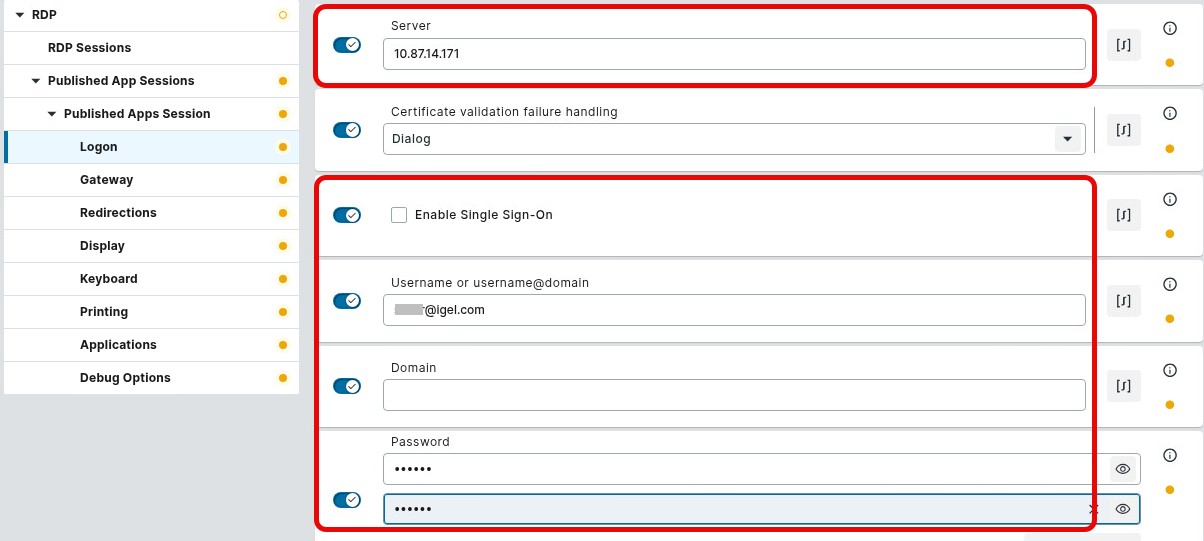
Go to Logon and provide the following data:
-
Server: IP address of the Windows VM
-
Enable Single Sign-On: Set this option according to your use case.
-
Username or username@domain: Enter the username; the format depends on the type of account that will be used for starting the apps:
-
For Entra ID, the username format is
[UPN]in combination with the checked setting Login to Azure ID -
For a local user, the username format is
.\[username] -
For an AD domain user, the username format is
[username]with the domain provided under Domain
-
-
Password: The password associated with the user
-
Domain: Relevant if the user is an AD domain user (see above)
-
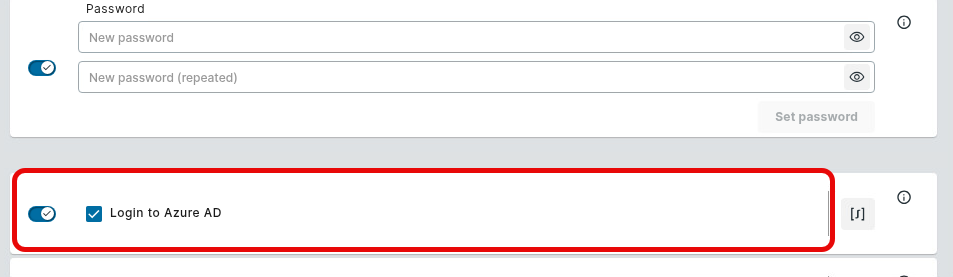
Login to Azure ID: Enable this if you are using Entra ID
-
-
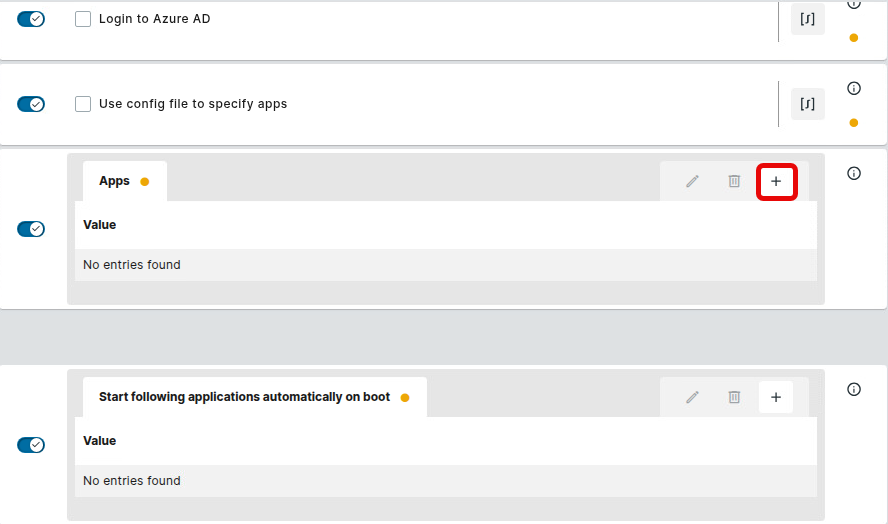
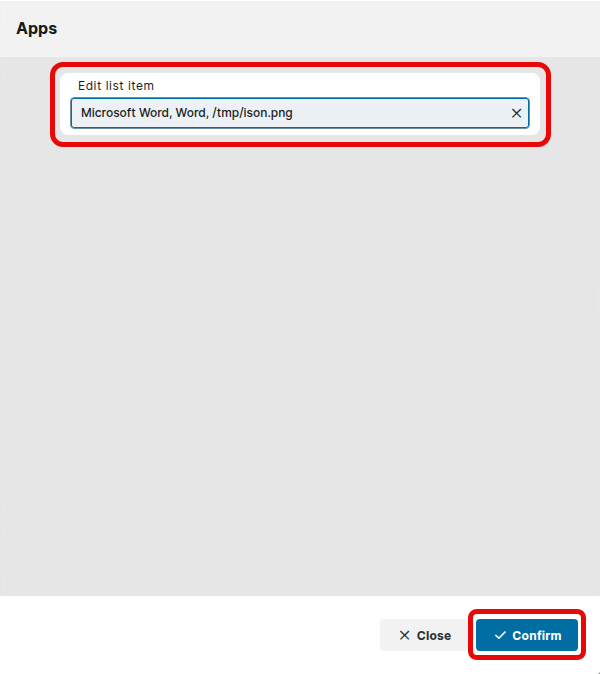
On the same Setup page, add an app entry in the format
[display name], [RDP name], [path to icon]. Example:Microsoft Word, Word, /tmp/icon.png.
-
Repeat this for every app you want to provide.
-
Assign the profile to your devices.
Example Video
The following video shows seamless apps from Windows 11 with IMH and RDP in action: